Periodic Error Correction and Photography in Altazimuth Mode
By John Ambrose
In the new GPS line of Meade's Schmidt Cassegrain telescopes periodic error correction (PEC) has been added to both axes, declination as well as azimuth. Most manufacturers offer PEC only in azimuth since those doing astrophotography with SCT's typically use a wedge and are polar aligned so tracking is solely in right ascension along the azimuth axis. But for those purchasing these new scopes astrophotography in altazimuth mode (no polar alignment) has become more realizable. But a major hurtle to overcome is effectively training the PEC. This is not an easy matter for those without the right equipment.
|
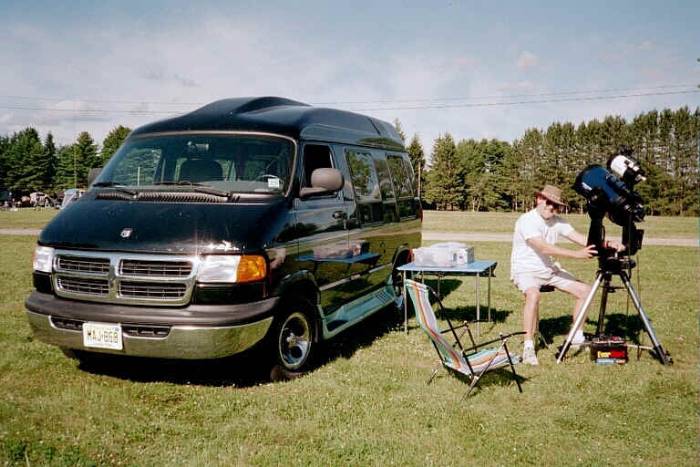
My Meade LX200GPS 10" in Altazimuth configuration
As most know PEC removes irregularities in tracking caused by the periodic error in the drive worm gear. Such error is the result of the worm gear being slightly out-of-round or having small burrs or deformities etc. With well-trained PEC the drive will speed or slow by computer control to compensate for these irregularities so tracking becomes smoother and much more accurate.
But before using the periodic error correction function the system must be trained. Training azimuth PEC can be done fairly accurately by manual control but the declination axis training presents a special problem. In azimuth the procedure is to pick a star due south and, using a recticle eyepiece, keep it manually centered for the required 8-minute training period. The training session requires a full axis rotation while the computer correction values are being stored at each of 200 locations. The rotation takes about 8 minutes to complete.
The problem comes when training PEC on the declination axis. Here you pick as star rising in the east or setting in the west and do as before but now the task of keeping it centered requires tracking adjustments in azimuth as well as declination (unless you are sitting exactly at the equator with the star due east or west). And it is extremely difficult to accomplish this effectively using manual control since your combination of adjustments will inevitably overshoot or undershot the mark.
I have found the best way, perhaps the only way, to do effective PEC training is with a guide-scope or self-guiding camera. The self-guiding capability of my Starlight Express MX716 camera came in handy here. Getting it to work is another story that I won't go into but once working it did a fine job.
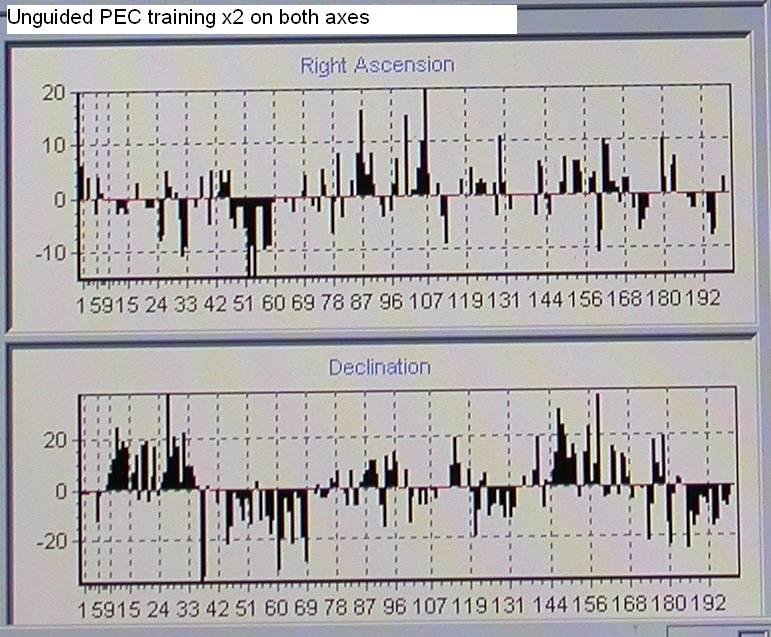
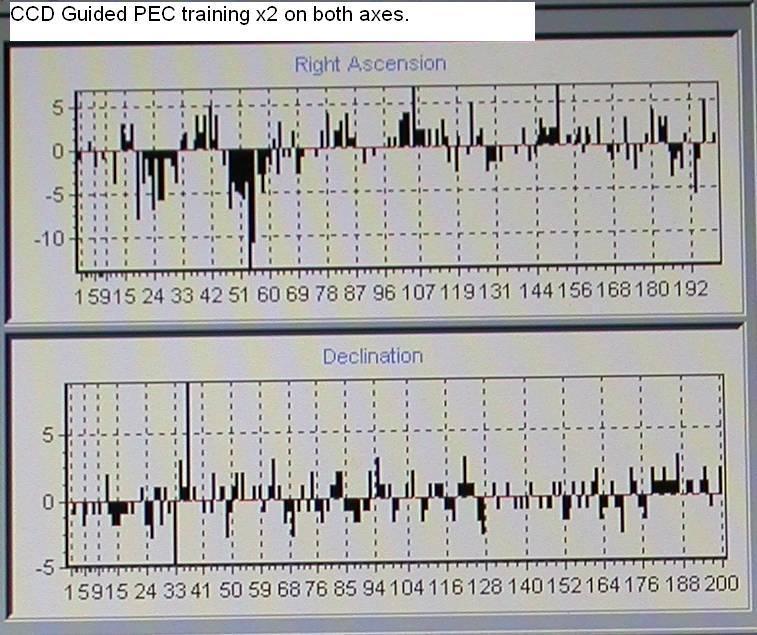
After doing PEC training on both axes the tables were downloaded from the telescope to my laptop and displayed using PECviewer. The tables are shown below with the first set showing the results of manual training (Figure 1) and the second the results of guided training (Figure 2). Training is comprised of four sessions: an initial training session and an update session each done on both axes. The update session refines the initial training and doing more than one update should further improve accuracy. This will be tested later.
The tables show the PEC correction for Right Ascension (Azimuth) and Declination with the relative amplitude of correction (y-axis) to be applied vs. the resolver position (x-axis) for each of the 200 positions that comprise a full axis rotation.
|
Figure 1 - Manual training session
|
Figure 2 - Guided training session
In comparing the sessions note the scale on the y-axis has more than doubled for the declination axis in the unguided case. Correction amplitudes swing from a -40 to +40 while the guided session averages just -2 to + 2. In Right Ascension the same trends can be seen between the guided and unguided but unguided shows several over/under shoots and erroneous points.
After the guided training sessions were complete tracking improved remarkably - objects remained dead center on the chip and steady enough for time exposures of up to 40 seconds with acceptable attrition rates. That is, there will always be some frames where smearing is present due to random error in the gear train or wind etc., so individual examination and deletion is required before summing for a composite. But the attrition rate is not usually more than 10% of the shots for 40-second exposures and this drops to less than 5% for 20-second shots. The edited shots are then summed and de-rotated using MaxImDL in Auto-Star Alignment Mode which sums and de-rotates the stack automatically. Occasionally it loses it way and you have to do a manual 2-star alignment but this does not occur often.
Since the setup is not polar-aligned field rotation will become evident as exposure times increase. With the field of view of my camera and with scope operating at f/3.3, the field rotation begins to show itself in the far corners at exposures of 60 seconds. So operating with 20 to 40 second exposures is well within limits for my setup.
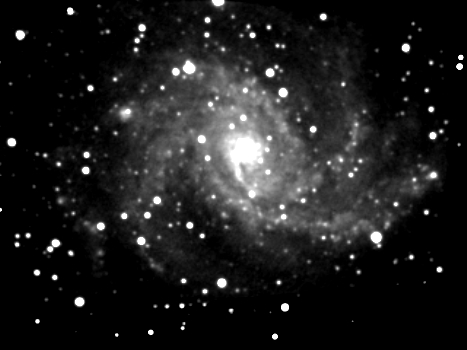
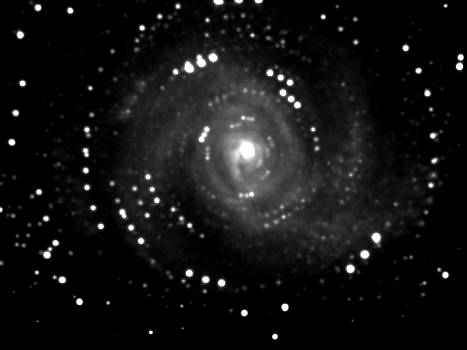
As an example of the field rotation that accrues with a 30 minute composite exposure Figure 3 shows the auto 2-star alignment of NGC 6946 while Figure 4 does a one-star alignment allowing rotation error to show. Three composite shots were used in the summation with approximately 20 minutes of time separation from first to last. There appears to be some 30 degrees or so of rotation. The shots were taken using my smaller format SBIG ST-5C camera.
|
Figure 3 - NGC6946 Mag 8.8; size 14'; SBIG ST-5C camera; auto-star alignment
|
Figure 4 - NGC9646; 3-shot one star alignment
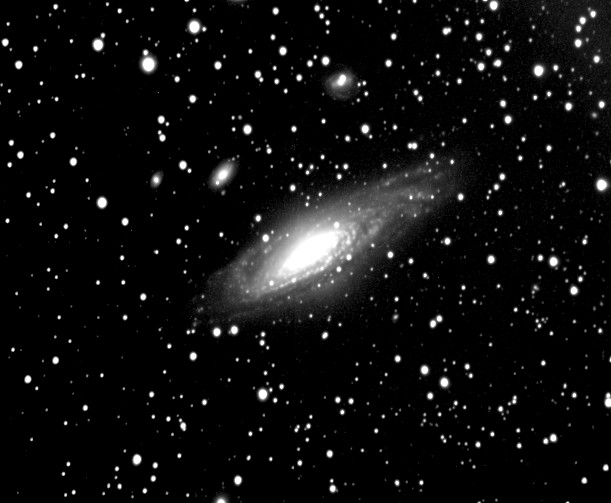
As can be seen doing a two-star stack and alignment is an effective means of removing field rotation. Also summing over longer time periods even multi-day shooting has not been a problem. Figure 5 shows a 96 minute composite of NGC 7331 taken over two evenings: the first evening using 20-second shots; the second 30-second shots. Also seen in the shot are NGC 7335 magnitude 14.5, above right; and NGC 7337 magnitude 15.2, above left.
|
Figure 5 - NGC7331 96 minutes; mag 10.33; size 10.6x3.8'; f/3.3; MX716 camera
The new breed GPS scopes not only allow effective altazimuth photography but also make setup a snap. Telescope setup time is 10 minutes or less after which you have full GOTO precision with thousands of objects at your fingertips. Instead of spending your first hour in the tedium of drift alignment you get to enjoy your scope immediately observing the stars. And after the scope's cool-down time has elapsed you move smoothly from viewing to shooting the objects at hand. In an age of ever increasing speed and automation telescope makers are also making their mark and we as users are able to reap the benefits.
Return to Website click here